Showing posts with label 1930's. Show all posts

Saturday, August 26, 2023

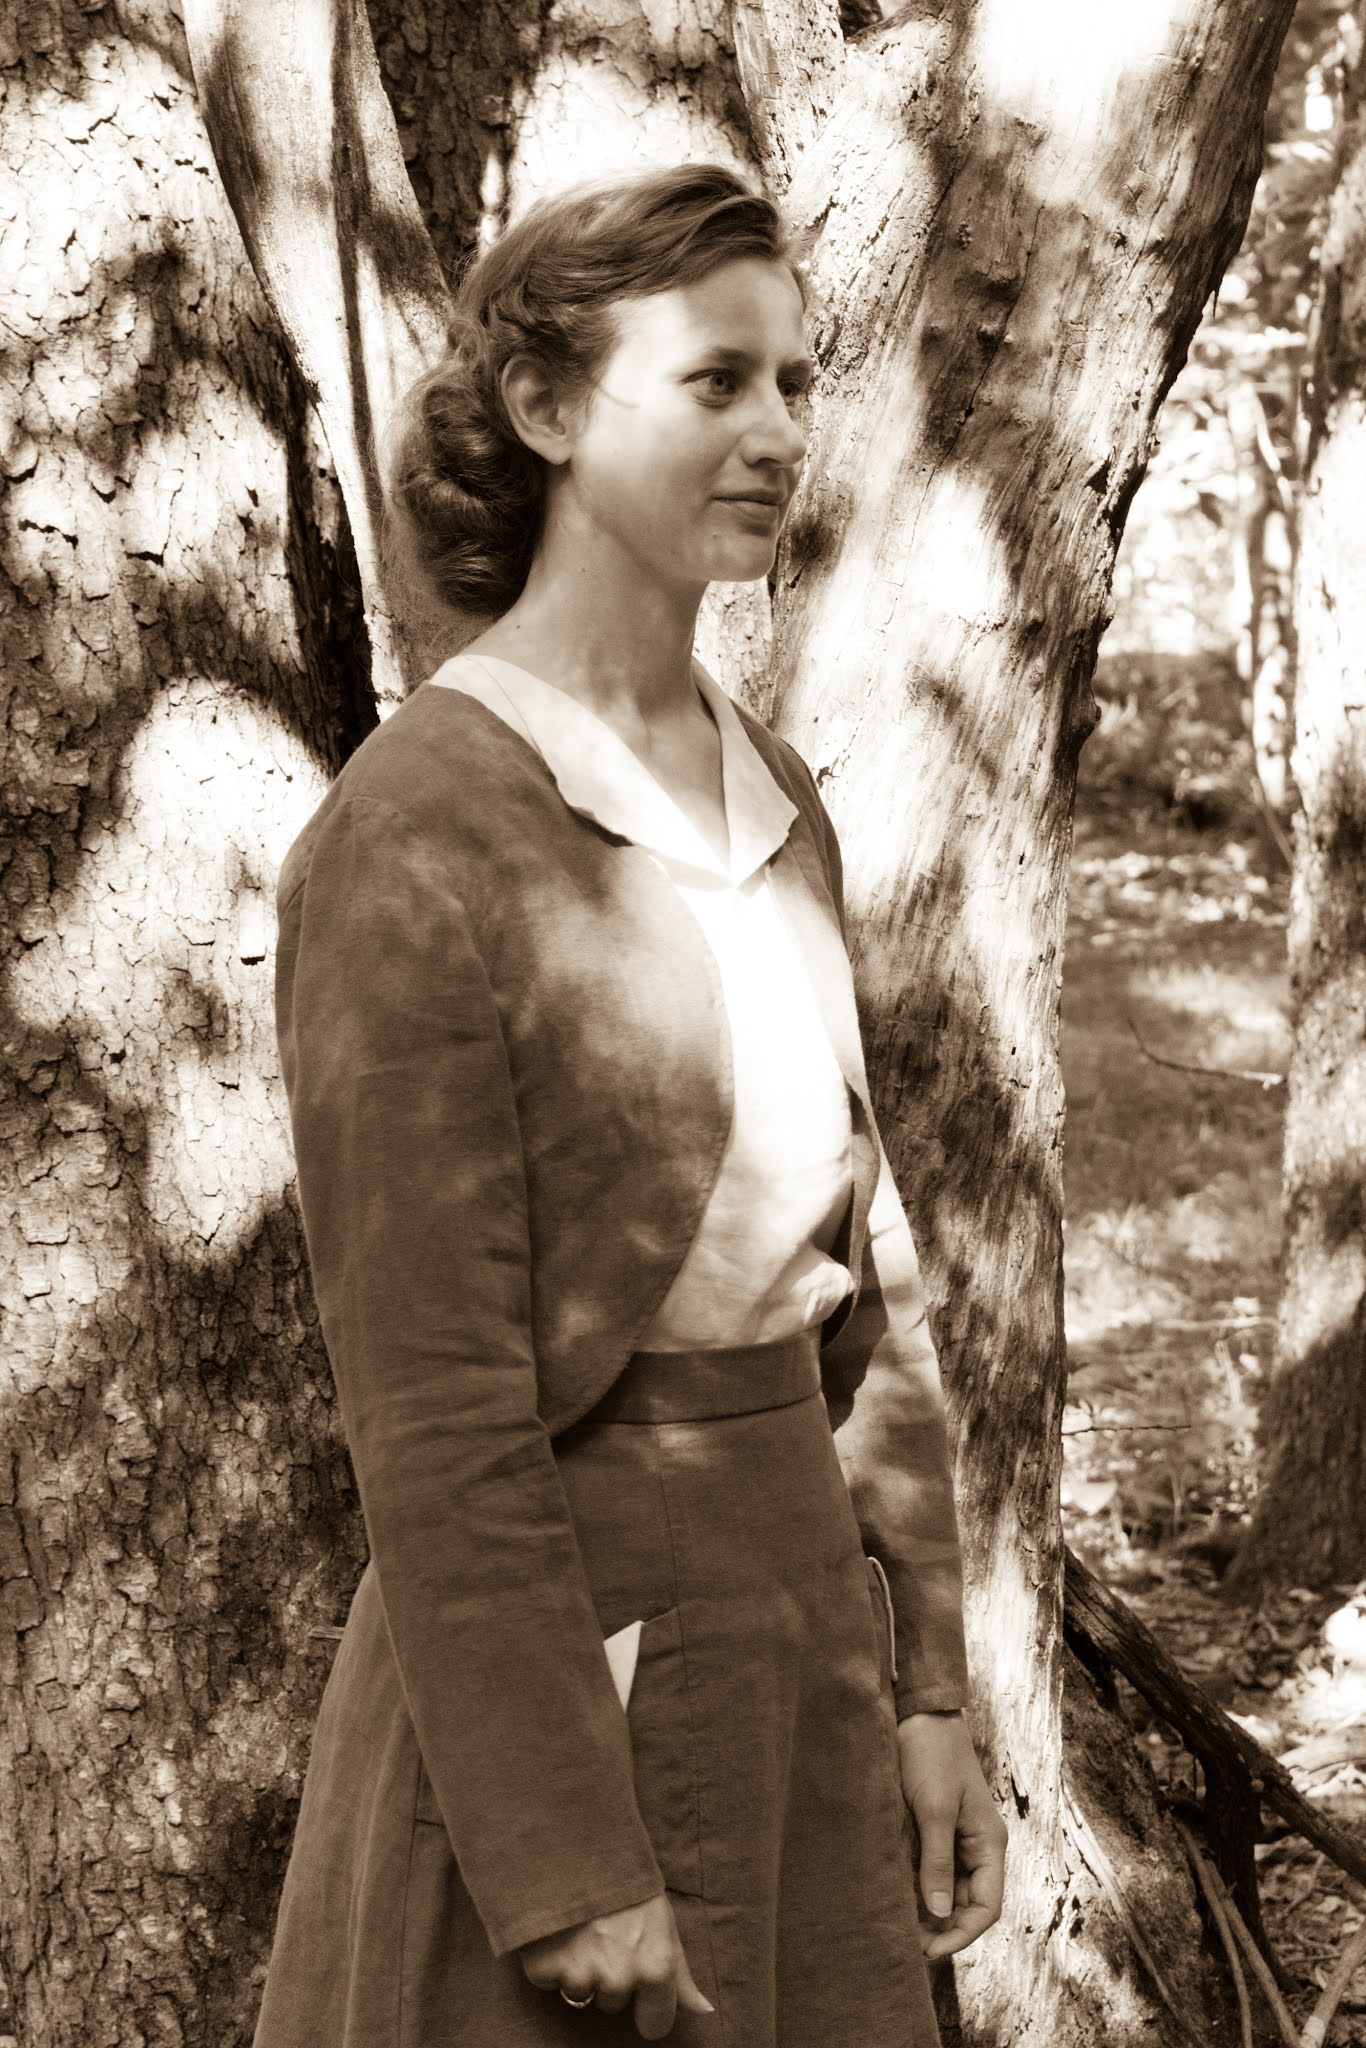
1930's Cream Maternity Dress

As I sit soaking up sweet baby snuggles, I've found a few moments to share one final Sunday-best maternity dress made in the last trimester with baby #2.

At 38 weeks, I asked my mother-in-law to snap a few photos on my phone before baby's nearly imminent arrival. I think she did a fabulous job for her first dress photography, don't you? 😃

You'll have to excuse my lack of shoes... we grabbed the photos quickly, and I didn't want to take the time to get my shoes and put them on, so here you see my natural bare-foot state when I'm at home, or anywhere that shoes aren't pretty much required. 😉 😛

This dress was pretty quick to make actually. I used the same pattern I drafted for the purple flowered dress, with just a couple adjustments. First, I cut off the kimono sleeves where the under-arm seam met the princess seams. With the sleeve off, I altered the pattern for the shoulder gather detail. I slashed the shoulder perpendicular to the shoulder seam, and slit it parallel to the shoulder seam from there to the neck and arm-hole seam allowances to add fullness for the gathers, without changing the neck or arm-hole measurements.


I originally planned to do a flutter sleeve, but after one mock-up decided the material was going to be too heavy and stiff for the light and flowy sleeve style. Instead, I put in sleeve B from Simplicity Pattern 8248. They fit perfectly without any modification, much to my delight!

Next I drew new lines to make a narrower skirt flowing from the bodice for a more 30's look, and to conserve fabric. I really like how the narrower skirt turned out, especially the smooth look of having the center back of the dress on a fold!

The material was purchased years ago with a different 1930's dress planned, but I never got to the project. I had 3 yards... in two pieces... a 1 yard piece, and a 2 yard piece. I'm very glad it was 60" wide, instead of the narrow 45" of the previous 2 cotton dresses! With careful placing, I found I could fit the side front and side back pieces on the 1 yard piece since they were shorter, and the center front, center back, and sleeve pieces fit on the 2 yard piece with enough scraps between pieces to cut a half-lining for the top. I met near disaster when I put on the larger view A sleeves I'd originally cut, realized they were just too puffy in the heavier-weight fabric, and had to re-cut the smaller sleeves. I was SO glad I had cut to conserve as much fabric as possible. The new sleeves just BARELY fit on the remaining larger scraps. WHEW! Crisis averted!

 
After some consideration, I elected to keep the dress very simple, letting the accessories dictate the look. Hooks and eyes close the neck slit at the center-front, making it nursing friendly, but very subtle. I had the perfect belt to do a coordinating earth-tone look, with a matching cream colored braid, and contrasting brown leather buckle. But, with the basic cream color, I can switch to any color belt, jewelry, etc. to change up the look.

After a couple wears, I've decided the poly/wool blend is not my favorite material for practicality. Every time it's washed the entire thing has to be pressed, and it already looks like fraying will be a concern. I plan to go through and serge all the seams to alleviate the fraying, and re-tack the lining in place to hopefully help with the difficulty of pressing the seams through the lining. I'm also keeping it for nice Sunday Church wear (after all, cream isn't a friend of potential muddy or ketchupy toddler hands... or clumsy mammas for that matter), washing as little as possible, and hanging as soon as I'm done wearing to ward off wrinkles.

I really love how this one turned out though, and how easy it was to make the adjustments to the base pattern for a totally different look! The material has a slight stretch in both directions as well, so range of motion and comfort are actually surprisingly high!

I've moved on to more fitted clothes for now, but I'm very satisfied with my first adventure into maternity clothes, and I couldn't be happier with the results!

Saturday, July 22, 2023

Drafting, Maternity, and Ladybugs


With baby #2 on the way, and being tired of ill-fitting, boring maternity clothes, I began a rather ambitious project to make myself at least a few vintage style maternity clothes to add to my wardrobe.

First, I scoured the internet for vintage maternity ideas that didn't just look like a drab tent. :P

I had two goals... maternity dresses that were decently flattering, but would also function for regular clothes and work well for nursing later! A monumental task, I found.

After much searching, I sketched my ideas, and narrowed them down to two favorites. Then came the lengthy and arduous task of drafting changes based on two patterns I had that I knew fit me well.

For this dress, I started by using Butterick 5556, which I had already altered the neckline and sleeves on for my favorite blue 1950's dress. I drafted a new front piece from the pattern base to have lots of room at the waist, while keeping the back piece as it was to avoid the full "tent" look. Next up, I extrapolated the lines from the bodice to flow into a skirt so the dress would be 1 piece top to bottom, rather than a bodice attached to a separate skirt.


It was actually fairly simple as drafting goes, and with another adjustment to the neckline for it's unique detail, drafting a new collar to fit, and shortening the sleeves a bit more the patterning process was finished.

 
I did end up having to make two adjustments to my original draft after the dress was cut and put together... Unfortunately I made some mistake when drafting the neck-gather detail, and had to cut down the neckline to eliminate them on the finished dress, which though disappointing, worked out just fine in the end. :) After completing and wearing the dress a few times, I added in a gusset under the arms, finding I'd tightened the sleeves more than I liked for comfort and range of motion.

Upon going through my fabric stash, I found this mottled blue cotton my mom had given me, leftover from making her mother-of-the bride dress for one of my sister's weddings... There were just 3 yards, and with a bit of finagling I managed to fit the pattern on the piece of fabric.

Originally the plan was to go for matchy-matchy dark blue trimmings with a hook and eye closure in front, but alas!, there was no such coordinating material in the store... What to do now? 

My husbands parents gave me the idea when they saw the dress in progress with a red sash hastily tied to show what it would look like belted in at the waist, and commented how nice the red looked contrasting with the blue. 

While searching for buttons for my second maternity dress, I stumbled across the lady-bug buttons that clinched the contrasting red choice, and the perfect red fabric to match the buttons was easy to find from there.


It was so fun to put together the lady-bug inspiration, and my husband obligingly spray painted my buckle black to finish off the lady-bug look.

A trip to visit my family provided the perfect opportunity to have my brother snap some photos in the beautiful woods, and of course, the cat once again got in on the action. Not to be outdone, my little gentleman added the sweetest photo-bomb to a dress shoot I've had yet. ;) :) 


The dress can be worn without the belt, as most likely ladies would have done back in the 30's-50's, but I rarely wear it that way myself. As you can see, even without the belt, the back stays more fitted. Hooray! Success! Though it looks definitively 50's belted in, the looser look gives a much stronger 30's vibe in my opinion.


It was definitely worth designing and drafting my own maternity dress, and I am very excited to see how it works out after baby is here and I can belt it in at the natural waist. :)

Friday, October 15, 2021

Casual and Comfy 1930's Corduroy Skirt

This piece of 100% cotton corduroy was an amazing thrift store acquisition. I'm not sure you can even find corduroy that's both sturdy and narrowly spaced like this anymore!

This skirt reminds me of the "golf" or "sport" skirts of the era, and I suddenly understand the appeal of a hefty weight material in a tailored skirt. It's incredibly practical and comfortable! I used the same skirt draft from the Brown 1930's Suit and Tigger Outfit, with just a bit more tailoring in cut for the stiffer fabric. I love how the weight of the corduroy holds the pleats.

 
I tried to be as strategic as I could with where the faded bit of the fabric landed, and since it's a "play" skirt, I didn't mind some defects of material... Plus the fabric cost less than $5 total, so how could I complain. 😉

I had SO much fun playing with the corduroy grain-lines for the pocket design and details of the skirt. The pointed tacking for the pleats even echos the angle of the pocket in reverse. 😊

The closure features several of my favorite techniques- a zipper put in with historically accurate hand picked stitching and hooks with thread eyes. Folks, thread eyes are the BEST! They stay hooked so much better than the metal bars or eyes, and they blend in really well to the garment!

I've had the skirt for over a year now, and it's been one of my favorite go-to, everyday skirts. It pairs perfectly with my linen blouse from the 1930's Linen Ensemble for warmer days, though the weight of the corduroy material makes it exceptionally well suited to chilly weather. Even my wool skirt, being a lighter-weight suiting is cooler. 😄

 
All things told, I think this is my favorite 1930's skirt to date, though it's really hard to decide between this and my brown wool one! Both are so comfortable to wear, but this one has pockets, so it noses ahead in the "favorite" race by just a hair. 😊😉

Thursday, September 2, 2021

1930's Linen Ensemble/Disneybounding Tigger

With wedding prep and projects, the editing of photos taken LAST summer got pushed aside to a less busy time. I've finally gotten around to revisiting them, and I'm excited to finally share a few of my favorite outfits with you all!

This particular outfit was a last minute decision for a themed Ball... I've always loved Tigger rather a prodigious amount, and since the Ball was movie character themed, I decided I wanted to be Tigger and set to work designing a Tigger inspired, but historically accurate outfit for the event. Why am I crazy and try to plan an entire ensemble in a matter of weeks?

Tiger striped cat with a Tigger outfit... :D

I drafted every piece for this ensemble, which took extra time, but was worth it. :) The Jacket was the hardest and took the most time in mock-up phase. I still want to hone and perfect the draft for future projects, but I was pretty pleased with my first jacket project drafted from scratch.

The skirt was pretty easy to make with just a few adjustments to my original draft for my brown 1930's skirt.


I only ordered 2 yards of linen for both the skirt and jacket... it took a bit of finagling to fit it all on, but it just barely made it with a few small scraps left in corners.

The pockets were quite tricky, but I'm pleased with how they came out, and I think it was worth the agony I went through to perfect them. I even brought in my engineering minded brother to consult on the proper angle for these. 😉

The blouse went fairly smoothly, thanks to the absence of sleeves. 😉 Sleeve drafting is my current bane, which I will hopefully someday over-come and begin to feel comfortable whipping out whatever kind of sleeves I want.

I love the versatility of 1930's blouses. Unlike many other decades, they were often designed to be worn un-tucked as well as tucked.

For the ball I merely added a fabric headband with Tigger shaped ears, and used a permanent marker to add a few stripes, and colored more stripes on a pair of skin-tone stockings.

Unfortunately I managed to misplace my stockings and ears for the shoot, so I don't have a photo of the Tigger outfit. *facepalm*

Saturday, August 7, 2021

A Once in a Lifetime Project- Tales of a Wedding Gown

 
Life has been crazy, and busy, and exciting recently... in case you didn't gather that from the nature of this post. 😉
 
Between planning a wedding, moving to another state, and settling into a new phase of life I haven't had much time lately to devote to blogging.


When I went about designing my wedding gown I knew I wanted a few things... I wanted it to be fairly simple in lines, but not boring, and I wanted it to include linen somewhere if possible, symbolic of the bride of Christ clothed in pure white linen. What better era to choose than the 1930's with their penchant for simple but detailed designs!

With the help of my Matron of Honor, Brigid, from Brijee Patterns, I came up with this 1930's design, featuring a little bit of a modern twist in the back. Brigid is fabulous at pattern drafting and helped with the design-side of the gown immensely!


Originally I thought my linen element would have to be only in the lining and/or slip, but the fabric for the dress is actually a silk/linen blend, perfectly fitting my wish of a 30's looking fabric AND linen.

Though it looks basic, the cowl neck probably gave the MOST trouble during design and mock-up phase, but it decided to cooperate before I threw out the plan and started over. 😜 

This back design was one of the elements I KNEW I wanted from the start, I had seen back v-necks with leaf decals, and both loving fall and having a fall wedding I wanted to find a way to incorporate that. I meticulously cut out each leaf, and stitched them on with silk thread forming the leaf veins one by one... it took an agonizingly long time, but I loved every second as I watched it take shape.

I really question my judgement in deciding on this closure design... 27 custom buttons with hand done thread loops... approximately a million hours later... ok, more like 12, it was ready to finish hems and wear. 😊


You'll have to forgive the bulky wool socks... October in the north can be a bit frigid.

I had a teeny, tiny, itty, bitty, 4 inch train and STILL in the first five minutes out the door for pictures I managed to trip... 😨 It was fine though... no one noticed.😏

 
The wedding was fall themed, so the bridesmaids, decorations, and flowers were an array of fall colors. Seeing all the colors together for the first time was so much fun!


Photos are by my talented friend Sarah Burns. She was amazing to work with and her photographs are stellar!